Showing posts with label clay. Show all posts

High Five to Jesse's MudBucket!


One of my favorite blogs "Jesse Lu's Mudbucket" got a mention in an article in Clay Times!  NICE!  Jesse is so energetic and her blog is a real inspiration!  Actually, there was a list of blogs sited in the article - Mudbucket being one of them.  Check out the post here and if you haven't been following Jesse's blog - get on that.

It's nice to be recognized! Congrats to Jesse Lu!   It's also great that more and more blogs are becoming more mainstream and inspiring new blogs to pop up.  A couple new ones to check out are Jennifer Brazelton's "Bumpy & Shiny"  and Michelle Gregor's new blog "Windytree" 


THANK YOU Fetish Ghost!


Zygote - a million thanks - I love my new piece - it's a beauty!!  And thanks for my little pirate charm!
We'll be talking about that workshop for 2011 - I very much look forward to it.


cheers!
linda


ps: sorry the pic is a tad grainy - bad picture taker...

a few new things


here are a few new 'experiments' - I've been fooling around with looks of things....it's part of the 'flyin' through the air' program I'm on right now.

And I am not talking about hallucinogens.

cone 5/6 bmix - cobalt, copper carb, mason stains and some new orange and reds...

Cup action


OK, so besides be-heh-hegging the sun to come out (which it just flat refused) my entire vacation; I wasted a lot of time wandering around in my beanie, wool scarf and jacket trying to navagate the winter in August.

(the current weather report is much better, it's been sunny every day since I've been back to work...o, joy!)

Oh, but I kid; I actually had a great time doing all kinds of fun stuff; and some of that free time was spent in studio making and drawing some new work.

Here are a few pics of the new mugs I've been making - they are in process of being glazed.  I hope to have some good ones to show you early next week!  I love trying new things...

My influences are always oceanic and pelagic, but recently there is a smattering of decorative floral, birds both sea and land, and some flourish patterning, altered Sailor Jerry artwork, and other wierd random designs.

what's bigger than a pint glass


new 'big gulps' for the truly fearless caffeine drinker! 

...or the doubly fearless 'drinker drinker'!

makin' cu ups


having fun making some new mugs...

happy friday my web friends - have a super fab weekend!

Glaze Mixer


I recently set up an account with Glaze Mixer and placed my first order.  Though I have remedial knowledge of glaze chemistry - I have done some glaze mixing at Skyline.  It's a learn-as-I-go approach at this point.

For my own studio space; I do not want to have a cache of chemicals around or go down that road.  I do, however, want to have the benefit of using some non-commercial glazes.  I have nothing against commercial glazes - however - I use them a lot.  I think this is a genius alternative to relying on a studio and having limited access to mixed glazes. 

They have a flushed out list of available ingredients - there was one they didn't carry on the list; I emailed the customer service email and in no time had a response and a subsequent email that the ingredient was ordered and put on the available list!


I'm goin' for it. I entered some glaze recipes and ordered some small amounts to test...off I go.  And note: you can keep your glaze recipes top secret if you like or elect if you want to share your recipe.   Also, you can have only 1 recipe in the system or a 1000!  They have a bunch of loaded community glazes available to order as well. 

Ryan at Glaze Mixer was super helpful and answered all my questions. 

I encourage you to check these guys out.

it's official

I'm will be selling my wares at the Cocoanut Grove in lovely Santa Cruz, Ca
at the 2010 Santa Cruz Sea Glass & Ocean Art Festival
Saturday & Sunday
November 6th & 7th


The Cocoanut Grove was built in 1907 as the "Neptune Casino." It was named a California Historic Landmark in May 1989. This 100-year-old facility boasts a rich and colorful history and a spectacular view of the Monterey Bay.


The Cocoanut Grove spells its name "Cocoanut" instead of "Coconut" since the facility's name was changed in the 1930s. This is an the OG way of spelling coconut, as in the Marx Brothers' movie, "The Cocoanuts."


Yee har!


some new pieces


I have been working with porcelain recently. I confess, I'm hooked on the stuff.  

I've been using Matt & Dave's Clay and I'm getting attached to it; I've tried four different porcelain clay bodies and keep going back to the Matt&Dave thing - it can take a beating and I've had ZERO cracking problems or issues with how I handbuild.  

Having taken a workshop with Molly Hatch - on the mishima process and who rocks this process like no one's business - a couple of Molly's tips have really helped me get over my "when in doubt -do nothing" approach to the wide open spaces of young clay!  And it's been great.  I just do not like drawing free hand on a newly built piece very much, tho I do some, and having the freedom of the template works better for me.  I have found it invaluable. 
I have to say that drawing with an exacto is super satisfying, if a little challenging.  Too much caffeine does NOT help and patience and concentration are key!

next is incorporating my new mad screenprinting skills! 


Whoa, that was super cool!


Michelle Gregor rocks the ACGA!  her work is AH MAY ZIIING!


Barb Vanderbeck - Barb's has a following - there are people always mobbing her at this show - it was a challenge just to get a picture here and there.  How can you not love her bird totems!  This little number up top with his cute headdress.  


Sharon Virtue.  Sharon just returned from her second trip to Haiti.  She has been travelling there with an organization providing art therapy for children.  She's a trail blazer this one, and as I have said many times, a creative force to be reckoned with!   


Shelley Simon and her very famous "Dirty Dishes" fountains.  Shelley does not have a website - we are working on that.


Forrest Lesch Middleton is the nicest guy!  I talked with him about his work and process for some time.  He never tired of my questions and was so awesome about sharing his process.  His work is detailed and tight and just gorgeous - the better still because it turns out he's such a cool guy.  And, I had to have a cup; I always buy cups. 


Tammy Burwell - To say her work is spectacular is to understate her talent as a thrower, her incredible knowledge and experience as a potter, teacher and in Raku and pit fire.  She is a delight to hang with and learn from!

The ACGA Show this last weekend was a great time; I'm so lucky to know so many wonderful amazing artists in the clay community and have many of them for friends.

I went on Friday to help some of my pals set up their booths.  It's great to have a behind the scene's view; to see the different booth set up and watch them deal with the circus of doing shows.  There is a lot to be learned from "Booth Set up 101" as Sharon was calling it! 
Have lots of tape, safety pins and table cloths on hand for one.  Never discount any measure of organization and always have a good attitude and plenty of caffeine!!

These guys are the pros. 

It was a fun day to see friends, meet some new ones, and talk 'shop' - Whitney, Rae and Josie were there - they always have people piling in and spilling out of their booths!  Always fun to see those guys~! 


dinner?


my heavily scheduled life keeps conjuring up pictures of too many plates spinning in the air. over my head. or whirling off in a multitude of directions.

I keep envisioning stacks and stacks of plates.  each unique. each related to one another in some way :)  waiting to be used, enjoyed, filled to the brim with food. 


using porcelain these days and lovin' it!

Molly Hatch rockin' it at The Clay Studio


I'm a big fan.
I LOVE her work - and now, all this color. fabulous. 
Check out her blog and more about this show at
The Clay Studio


Molly Hatch Blog

mostly done


black mountain sculpture.  

with a nod to Rae  - this is the 'place' I like best - the just done, and green place.  There is the feeling of arrival and rest at this stage - I like it best. I like the color and the feel too.  It's a pause in the process where ideas have been realized.  Maybe that's it?

then it's fired and it's another thing altogether...

stacked!


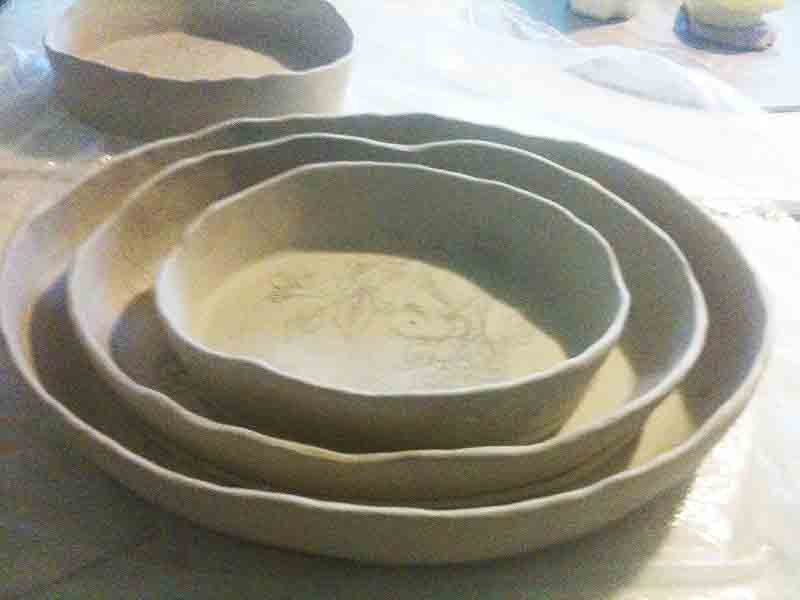
I got to work this weekend and made some new large stacking serving platters with mishima decoration.  I like the mishima process A LOT!  I used to carve or stamp of course, but wait to fill in color in the bisque stage.  I like this more refined process - though it can be tricky. 

I used an exacto knife; I can see why it is both the best and not-so-best tool for the job - it's hard to "draw", to turn corners, to get a rounded off line.  But, by far, it is the best line quality. 

I usually use a pin tool, porcupine quill.  I also tried the speedball pen recommended by Molly and wasn't that into that.  I prefer the look of the exacto. 

Also, the tip about using natural sponges vs. commercial is dead on as well.  It's time consuming - but SO MUCH FUN!!

p.s. sorry for the craptastic photos!

Fruity


One of my wacky freeform platter-bowls overflowing with fruits was posted on FACEBOOK this morning by a friend.  I think about my pieces and wonder if they are having a good life :)  are they being used?

neat!

Number 15


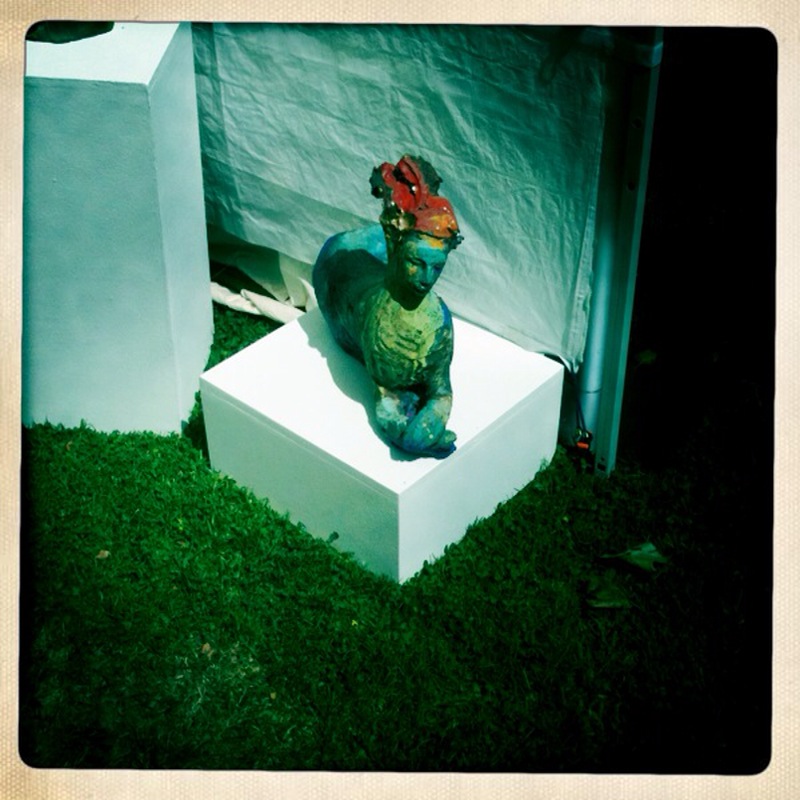
Number 15.  I'm ambivalent.  These pictures show her as looking a bit flat.  I do still want to add some decal work to her and so I am not surprised it has a feeling of being incomplete.

Anyone else reading it that way?  

eerrrrr....hmmm (thinking)...

I think the thing that's bugging me is that at the end of most of my sculptures; I have a different idea of what I may have done - even a small part I wished I'd done differently.  Which bothers me.  I cannot completely form the picture of where I'm going before I start?  I do wing a fair portion of the subject as I go - in this case, it seems to show.  Sometimes all the pieces go together and it works; and sometimes they don't. 

This piece has an odd sense of something not fitting. 

I find this an interesting process - to look at what works and what doesn't and how I think I need to work on the concept or planning process?  I don't know, do other people work like this? 


...a friend said; "oh, she's having a bath?" 
hilarious. 


Welcome - it's punchy Monday!!

UPCOMING EVENT

EMPTY BOWLS PROJECT
Fundraising Event!
Wednesday, April 21st
6pm - 8pm
Skyline College

The Skyline College Ceramics Department has been working hard in the "bowl factory" making 200+ bowls over the last 6 mos for this fabulous fundraising event benefitting the Peninsula Food Pantry.  Music, Food, Entertainment and a lot of bowls!!
Please join us!  

100% of the proceeds will go directly to the food bank!


one done, two to go


I took this last night with some new camera app for the iphone - I'm liking it.

This is a white matte -glaze - I did refire her. I may possibly do some decal work on her...

two to go.

decal roundup


Here's what happened; sorry for no pics...you'll have to trust me on this one! 


All of these pieces were bisque - the glaze and decal applied for a single firing.
1. Top Left Purple: Decal OVER low fire clear matte glaze - black images (this is important) fired to 06. 

Result - 5 stars!  The image came out great - the black creates a perfectly clear iron ox sepia toned image.  This is over unfired glaze.  So, you can't move it around a lot - basically you get it on there and that's that. 

2. Right Middle: Decal OVER low fire matte white glaze - fired to 06 - black image.

Result: 5 STARS! Great result over the glaze - which also means you may be able to eliminate a firing - uh, yay! 

3. Bottom Left: Decal OVER low fire clear glaze - fired to 06.  This image was a little washed out; the glaze pulled out a lot of the detail but it did not disappear; just a faded image.  Again, sorry, no pics; I'll have to take them this weekend. 

*also note that I put a grey toned decal image (you can see the compass) and it all but disappeared in the firing.  So, black is the new black!  Stick with black images to get a clear result.


All of these pieces were previously glaze fired to 06.  We applied the decals and then low-fired to 08 on a fast fire schedule: again good results on all these pieces - barring the grey images; they were ghosts of their former selves.  The black images worked perfectly.

All of these are low fire glazes; the top left a clear low fire glaze - the blue vase is underglaze with clear glaze over it and the red a low fire glaze. 

I will say that the decal image on the red piece was a little faint - but strong enough.  On the blue vase it looked almost orange! 


The decals were from computer images and printed on decal paper.

If anyone has any suggestions or has experience - I would LOVE to hear from you.  Please comment.  This process is not full proof - I've talked with other folks and there seems to be a wide variety of results - I wouldn't run off and put decals on a piece you love - we have just begun the testing process - I will continue to report experiences with this process.